
Here is a list of stuff you will need.
Materials:
Newspaper
Elmers glue
Water
Flat large tupperware dish with lid
stirring utensil
Work area that can get messy and stay that way until project is done.
space heater (optional but helps everything dry much faster)
Newspaper
Elmers glue
Water
Flat large tupperware dish with lid
stirring utensil
Work area that can get messy and stay that way until project is done.
space heater (optional but helps everything dry much faster)
Paint
Paint brushes
Clear coat varnish
Clear coat varnish
 First I blew up a big balloon to make the shape I wanted. In this case just a big globe like pinata. I used a Dollar Store Punch Ball as my shape. You can make it whatever shape you want by taping different sized balloons together. My Mom made a dog bone once. Use your imagination!
 Then tear up your newspaper into strips that will fit into your tupperware container. Put the Newspaper strips in a large container, I used a small box. Then mix up the medium for paper mache. I used Elmers glue and water. Basically I used 1 part water 1 part glue. I mixed it up in the tupperware container stirring with a small spatula.
 Start dipping the strips of newspaper into the glue mixture. When the strip is saturated run your fingers down the strip to remove excess glue, catching the drips back in the tupperware container. Place the strip of newspaper onto the balloon. Repeat and overlap the newspaper strips by an inch or so over the strip next to it. Cover the whole shape. Repeat until your layer is 3-4 newspaper strips deep. Remember to leave an opening at the top of the pinata so that you can add candy to your completed pinata. Once your first layer is applied to the balloon(s), set up your space heater (or place pinata next to a heat source) so that hot air blows on the pinata and speeds drying. Cover your glue mixture wit the lid between layers so the medium does not dry up. You may need to make more batches of medium to complete your pinata. Each layer may take up to 24 - 48 hours to dry depending on how thick your layer is, how much glue you use, and the humidity in your room.
 After the layer is dry and hardened repeat the paper mache process again. Dip paper in glue mixture, squeeze excess of paper and then place onto pinata. Overlap as you go. Cover pinata 3-4 times. Allow to dry completely by using the heat source again.
 Once the sides are strong enough to retain the shape you desire, use a pin and pop the balloons inside. This will allow for better air circulation and allow for more even drying.
This next step is optional. Depending on what the age range is for the children or how many children will be breaking the pinata open, you may want to reinforce the pinata with string, yarn, wire, chicken wire, etc..... Obviously the stronger the reinforcement the more difficult to break open. For my pinata I used yarn for reinforcement. I did one layer of paper mache so that the shape was sticky with glue. Next I wrapped yarn around the shape in a criss cross manner until the shape was wrapped well with yarn. Then I did 2 more sheets of paper mache covering the whole shape. Allow to dry completely.
After the yarn layer is completely dry I added an handle. This is so you have something to attach rope to so you can suspend the pinata in the air once it is done. I used a strip of cloth. The cloth was long enough to reach all the way around the pinata and created a loop right above the opening I had left for the candy. I dipped the cloth in the glue mixture and applied it to the pinata. I then paper mached 3-4 thicknesses of newspaper over the top. You could also add another layer of yarn over this layer to reinforce the handle. Allow this layer to dry completely. Please note it may take additional time for this layer to dry because the cloth soaks up more glue than paper.
Place as many layer of paper mache as you desire to reach the thickness needed. Consider the group of people you are making the pinata for. If the kids are older or stronger, then more layers and reinforcement is needed so that EVERYONE gets a turn to hit the pinata before it breaks open. If the kids are little and not as strong, use fewer layers so that someone is successful at breaking it open! ***For my crowd of 2-6 year olds and we had 13 kids total I used 2 layers of yarn, and 10 layers of paper mache. Plus paint and clear coat. It was a bit too strong and we broke the stick before the stick broke the pinata. ***
Once you have applied enough layers and feel confident that the pinata is strong enough allow it to dry completely. I would give it a few days to dry completely all the way through.
 This is about how big the pinata was compared to Kaleb. It took 1 week to get all the layers on and to get it painted and dried in time for Kaleb's party.
 This is about how big the pinata was compared to Kaleb. It took 1 week to get all the layers on and to get it painted and dried in time for Kaleb's party.
  Next is the fun part! You get to paint it! I started with a base coat of just plain red.
Then I wanted to put flames on it like Optimus Prime has in the movie Transformers. For this step I asked my brother Dave to come draw the flames for me.
 First he drew them on paper.
Then he traced them onto the pinata with a pencil.
 Then I used Blue paint and following his pencil marks put the flames on the pinata. It took about 2 coats of paint for it to cover the pinata paper.
After the blue paint was dry I coated the whole thing with clear coat varnish. I mostly did this so it would be shiny like the paint on Optimus Prime. Depending on what your shape/theme is, you may not need the clear coat.
The finished project!!!!!
.jpg) Then the kids got instructions on "pinata etiquette"!
Then the kids got instructions on "pinata etiquette"!

.jpg) Then the kids got instructions on "pinata etiquette"!
Then the kids got instructions on "pinata etiquette"!*Wait your turn. Sit on your bottoms away from pinata while you wait.
* Don't swing until everyone else is sitting down.
* 3 swings per turn.
* Guest of honor goes first, then your turn is by birth order (or alphabetical)
* Once the pinata breaks please gather the candy and place in candy bowl.
* Candy is evenly distributed to each child and other party guests.
Big Swinger!
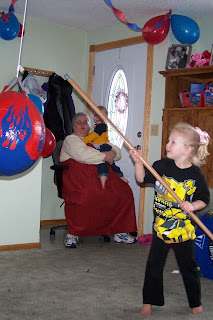


 The AFTERMATH
It was a complete success! It was worth the sticky hands, dry time, and effort! Kaleb was thrilled! And that was really the point!
:)
:)
:)
:)
:)
1 comment:
That is awesome I will have to do this sometime for one of the girls Mel had a pinata last year I just bought it and it was a cheap POS so this sounds like more fun to do. I thank you for posting how to do it. You are the best mom!
Post a Comment